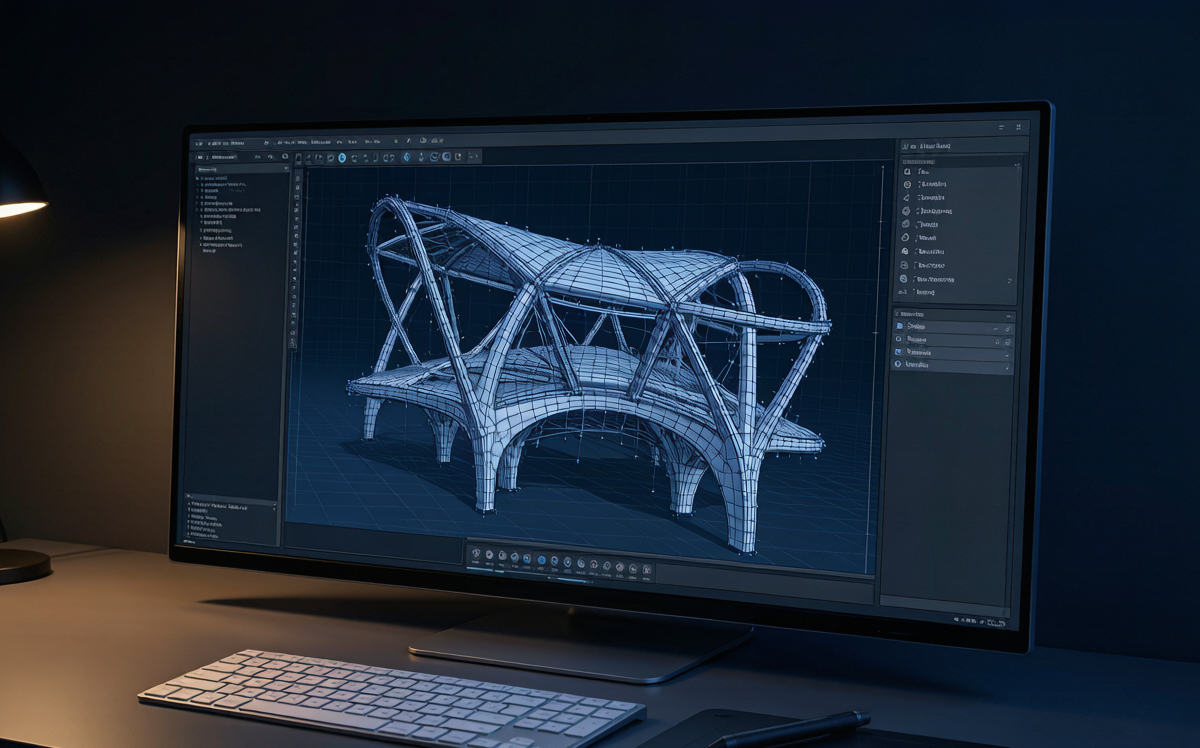
There is a widely shared joke in the architecture industry: “A designer can whip up a fluid in Rhino in 10 minutes, but turning it into a real building might take 10 months.” As a new generation of 3D printing robots enters the construction site, this gap is being closed for good.
Part I: The Long-Standing “Model-to-Reality Gap”
Every architect knows the scene: in Rhino or Grasshopper, the parametric free-form surfaces, double-curved panels, and irregular structures all look perfect on screen — light, fluid, and natural. But when you try to turn them into reality, problems emerge:
| Stage | Traditional Method | Pain Point |
| Model Translation | Manual STL/OBJ export, repeated defect checks | Time-consuming, error-prone |
| Mold Splitting | Manual splitting into transportable units | Complex surfaces hard to split |
| Mold Fabrication | Custom mold for each irregular component | Extremely high cost, long lead time |
| Factory Precast | Cast, cure, then transport | Transit damage, storage issues |
| On-Site Assembly | Heavy lifting, manual alignment | Low precision, high rework rate |
From digital model to physical building, at least 5 traditional intermedia steps lie in between — each consuming time, money, and precision. So — what if a 3D printing robot could read the Rhino file directly and “grow” the building on site? How many steps could be eliminated?
Part II: The AiUltraProd Answer — 3 Steps, Zero Molds, Direct Print
AiUltraProd’s answer is: from Rhino model to on-site print, only 3 steps. The core logic: eliminate all middlemen — no mold factory, no precast plant, no logistics. Design data drives the robotic arm’s extrusion nozzle directly, layer by layer, “painting” the building into existence.
Step 1: Model Preprocessing & Slicing
This is the step architects know best, and where AiUltraProd turns “digital” into “printable.”
What the designer does:
• Complete the design in Rhino (NURBS, Mesh, or SubD — any format)
• Export as watertight STL or OBJ
• In AiUltraProd’s slicing software, one-click configure: layer height, infill rate, material type, print path strategy
What AiUltraProd does:
• Auto-detect and fix model defects, flipped normals, and other common issues
• Auto-optimize print paths: intelligent supports for overhangs, optimized layer orientation for large-span curved surfaces
• Generate robot-executable G-code or proprietary motion instructions
Comparison: Traditional methods require manual mold splitting and design — 4-6 weeks. AiUltraProd’s auto-slicing takes 30 minutes to a few hours, even for complex curved components.
Step 2: Material Readiness & Print Parameter Tuning
Designers don’t need to worry about this step — it’s handled by AiUltraProd’s robotics engineers and technical team.
What happens:
• Match the right robot model based on component size and precision requirements:
— AIUP-RC1-3100 (Crawler-type) → Large-volume on-site printing
— AIUP-RF1-3100/2700 (Fixed) → High-precision prefabrication
— AIUP-RT1-2700 (Rail-type) → Extra-long linear structures
• Adjust nozzle temperature, extrusion speed, and inter-layer cooling time based on material formulation (cement-based, polymer-based, solid-waste-based, etc.)
• Digitally simulate the print process to predict inter-layer bond strength and deformation risk, auto-correcting parameters
Comparison: Traditional mold-making requires a 1-2 week tooling cycle — one revision means remaking the entire mold. AiUltraProd’s tuning process needs only 1-2 sample prints, each under 5 hours.
Step 3: Robotic On-Site Printing
This is the moment digital construction becomes real.
What happens on site:
• Positioning: The robot auto-calibrates on site (laser/vision-assisted), aligning with the BIM model coordinates
• One-click start: The optimized print file is uploaded to the robot controller — press start
• Layer-by-layer printing: The robotic arm follows the optimal path, extruding material from the foundation upward, achieving ±2mm layer accuracy
• Real-time monitoring: Multiple sensors feed back extrusion pressure, layer height deviation, ambient temperature, and humidity — closed-loop adjustments in real time
• Finish: Component surfaces meet design standards, requiring only light sanding or direct use — no plastering needed
Comparison: Traditional double-curved panels require 4-6 weeks from mold-making to installation. AiUltraProd’s direct print takes 3-7 days with zero mold cost.
Part III: Why So Many Steps Disappear — The Technology Breakdown
On the surface it’s “3 steps vs. 5+ steps,” but three core technologies make it possible:
1. Path Planning Engine
Traditional 3D printing path planning relies on preset templates; irregular curves often require manual per-segment correction. AiUltraProd’s path planning system:
• Auto-identifies geometric features (flat zones, curved zones, overhang zones)
• Assigns different strategies per zone (fine paths for curves, rapid paths for infill)
• Balances print speed with extrusion volume in real time to prevent over- or under-extrusion
Result: paths that traditionally take 4-6 hours of manual optimization are completed in 15 minutes with higher quality.
2. Multi-Axis Linkage & Mold-Free Forming
AiUltraProd’s robot series features 7-axis robotic arms with multi-axis rail/crawler chassis:
• Mold-free forming: No templates or support frames needed — material cures and sets in mid-air
• Large-span integrated printing: Crawler/rail chassis moves during printing, breaking the size limit of a single print
• On-site printing: Eliminates factory precast + transport + crane installation — “grows” on site
This is why the 2,169 custom non-standard double-curved roof panels for the Yunnan Yiyaogu Runfei Garden project — each one unique — required zero molds. Every panel was sliced directly from the Rhino model and printed by the robot.
3. Material-Process-Environment Closed-Loop Control
The biggest challenge in construction 3D printing isn’t “printing it out” — it’s “printing it strong.” Inter-layer bonding, shrinkage cracking, and ambient conditions are real problems. AiUltraProd’s system builds a material-process-environment closed loop:
Sensor real-time acquisition → Compare against ideal model → Dynamically adjust extrusion speed / nozzle temperature / inter-layer wait time → Corrected instructions sent to the robot in real time
Part IV: Two Case Studies — The Full Walkthrough
Case 1: Yunnan Yiyaogu Runfei Garden Visitor Center
| Phase | Activity | Duration |
| Rhino Model Design | Architect completes parametric design of double-curved roof | 2 weeks |
| AI Slicing & Path Optimization | 2,169 irregular panels auto-split and paths generated | 2 weeks |
| Robot Parameter Tuning | Solid-waste concrete mix adapted, 2 test prints | 3-5 days |
| On-Site Printing | RC1-3100 crawler robot prints panel by panel on site | 3 months |
| Installation | Printed panels lifted directly into position | 15-20 days |
Key comparison:
• Traditional approach: At least 10 months (16 weeks molding + 20 weeks precast + 6 weeks installation)
• AiUltraProd approach: Approximately 4-5 months total
• Time savings: ~55%
• Mold cost savings: 100% (zero molds)
Case 2: Dali Wanhuaxi 3D Printed Bridge
A landmark case — from Rhino model to bridge closure in just 30 days.
• Design phase: Parametrically designed arch bridge, structurally optimized in Rhino
• Printing phase: System divided the bridge into 24 printable segments, robot-printed individually, assembled on site
• Key metrics: Total print time just 12 days, material consumption reduced by 60%
This bridge not only proves AiUltraProd’s feasibility in public infrastructure, but also marks the leap from “decorative components” to “structural load-bearing elements” in digital construction.
Part V: Looking Ahead — When the Designer Becomes the “Printer”
AiUltraProd is redefining the architect’s role.
In the past, a complex Rhino surface meant:
Find a mold factory → negotiate prices → wait for mold → check samples → not satisfied → redesign → wait another two weeks → finally receive bulky, heavy panels
Now, the same surface means:
Auto-slicing → transfer to robot → visit the site the next day to see the print → not satisfied → modify the Rhino model → robot prints the new version directly
Design freedom × construction speed × cost control — formerly you could only pick two. Now you can have all three.
AiUltraProd’s vision: every architect has their own “printer” — not a person, but an intelligent robot that understands Rhino, understands materials, never tires, works around the clock, and executes every trajectory to millimeter precision.
Back to the Original Question
From Rhino model to on-site print, how many steps does it take?
In AiUltraProd’s system: 3 steps.
No mold factory. No precast plant. No transport loss. Only:
1. Model preprocessing & automated slicing
2. Material & parameter tuning
3. Robotic on-site printing
And in the near future, these 3 steps will become even shorter — when the system can auto-recognize model intent, auto-match the optimal material formulation, and auto-orchestrate a robot swarm — going from Rhino model to on-site print might take just one step: drag and drop the file into the system.